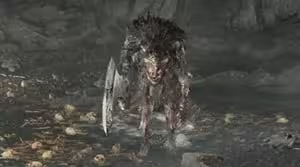
Beastman of Farum Azula
| Location | |
| DragonbarrowRegion | |
| Dragonbarrow CaveGrace | |
| Dragonbarrow ForkGrace | |
| Dragonbarrow WestGrace | |
| Groveside CaveGrace | |
| LimgraveRegion | |
Drops | |
| Flamedrake Talisman | |
| Flamedrake Talisman +2 | |
| Runes | |
| 5000 | |
| Description | |
Beastmen from the doomed Farum Azula, the slowly crumbling ruins in the skies.
These ruins are said to be the remains of a giant mausoleum enshrining an ancient dragon, guarded by chosen beastmen who wield weapons clad in lightning. | |
| Notes | |
Groveside CaveGrace.
Dragonbarrow CaveGrace
The boss of Dragonbarrow CaveGrace.
Head north from the room with the Lesser Runebear, Drop down some ledges, head east and then south, and drop down another pit to reach the bosses.
Parriable: Yes.
Is vulnerable to a critical hit after being stance broken or parried
Negations (or Absorptions).
Standard: 0.
Slash: 0
Strike: -10
Pierce: 0
Magic: 0
Fire: -20
Lightning: 20
Holy: 0
The negation numbers are the of your damage that gets blocked.
For example, if a negation is 60, 40 of that damage by that type will go through and 60 will be negated.
Bigger number less damage.
A negation of 100 means no damage goes through, and a negation of -100 means the enemy takes 2x damage from that source.
0 means damage goes pretty much as is.
Beastman of Farum Azula Boss Guide for
Beastman of Farum Azula Fight Strategy.
The Best Tips for Beastman of Farum Azula:
Bait its long attack combos and counterattack once it's finished.
Try to avoid blocking since its attacks drain so much stamina.
Use Rotten Stray Ashes to take advantage of its relatively low resistance to Scarlet Rot.
Melee Strategy
Bait and Punish: Bait the Beastman's attacks until it completes a full combo before attacking a couple of times and then backing away.
Its weapon drains a lot of stamina if you block it, so after you land a few hits it's better to dodge back far enough that you're out of range of its swings.
When in doubt, stay as far away as you can.
This boss doesn't have a ton of stance, so charged or jumping heavy attacks will stance-break it easily.
Parrying: Most of the Beastman's attacks can be parried, except for the Two-Hand Slam and the last two attacks of the 6-Hit Combo (the uppercut and the overhead attack).
Magic and Ranged Strategy
Keep Your Distance: This fight is considerably easier at range.
You can bait out its combos the same way you would in melee, but you can punish them from range rather than running into danger.
Just keep your distance when it begins attacking and only block if you absolutely have to.
Attacks & Counters
Attack
Description
Counter
One-Handed Double Swing
Cleaver: Grabs its cleaver with one hand and swings it twice horizontally.
Parry the first swing or roll away.
Avoid blocking, since it will lose you a lot of stamina.
Two-Handed Double Swing
Cleaver: Grabs its cleaver with two hands and swings it twice horizontally.
Much faster than the One-Handed Double Swing, but covers much less range.
Parry the first swing or roll away.
Avoid blocking, since it will lose you a lot of stamina.
Cleaver Stab
Cleaver: Pulls its cleaver back and then stabs it forward
Roll to your right to avoid the follow-up
Overhead Slam
Cleaver: Pulls its cleaver over its head and slams it down in front
Roll to your right to avoid the follow-up
Sideswipe
Cleaver: Steps to its left and swings its cleaver clockwise along with it
Roll right and get in a hit while it recovers
Spinning Slice
Cleaver: Spins in a full clockwise circle ending with a horizontal slice
Roll right, since the hitbox is mostly towards the end of the attack
Barbaric Roar
Cleaver: Lets loose a fearsome roar dealing damage in a small area of effect
Roll backwards and prepare to dodge the follow-up combo
6-Hit Combo
Cleaver: Roars, then attacks six times: four horizontal swings, an upwards vertical attack which launches it into the air, then a final overhead slam.
Dodge away and keep your distance during most of the combo, then roll in during the final slam and attack during its recovery animation.
Two-Hand Slam
Cleaver: Grabs its cleaver with two hands, jumps forward, and slams it into the ground.
There's a long delay before it jumps, so be careful not to roll too soon.
Once you successfully dodge, you have time to get in a few attacks of your own.
: Attack can be parried
Beastman of Farum Azula (Cleaver) Combo Chart
Beastman of Farum Azula Groveside CaveGrace.
Drops
1,000
Flamedrake Talisman
HP
1,417 |
