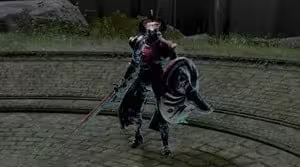
Crucible Knight
| Location | |
| Auriza Hero's GraveGrace | |
| CaelidRegion | |
| Capital OutskirtsRegion | |
| Crumbling Farum AzulaDungeon | |
| LimgraveRegion | |
| Nokron, Eternal CityGrace | |
| Redmane CastleDungeon | |
| Siofra AqueductLandmark | |
| Stormhill EvergaolEvergaol | |
| Stormveil CastleDungeon | |
Drops | |
| Aspects of the Crucible: Horns | |
| Aspects of the Crucible: Tail | |
| Crucible Hornshield | |
| Somber Smithing Stone [6] | |
| Runes | |
| 2100 | |
| Description | |
Usually | |
| Notes | |
Stormhill EvergaolEvergaol.
Stormveil CastleDungeon [More Info].
Siofra RiverDungeon [More Info]
2 in Siofra AqueductLandmark [More Info]
2 in Leyndell, Royal CapitalDungeon [More Info]
2 in Crumbling Farum AzulaDungeon [More Info]
Stance: 80.
Parryable: Yes
Is vulnerable to a critical hit after being stance broken or parried
Damage: Standard, Strike, Pierce, Holy (Phase 2)
Negations (or Absorptions)
Standard: 35.
Slash: 35
Strike: 35
Pierce: 35
Magic: 40
Fire: 20
Lightning: 20
Holy: 40
The negation numbers are the of your damage that gets blocked.
For example, if a negation is 60, 40 of that damage by that type will go through and 60 will be negated.
Bigger number less damage.
A negation of 100 means no damage goes through, and a negation of -100 mean the enemy takes 2x damage from that source.
0 means damage goes pretty much as is.
Notes
Attacks are very difficult to block.
Giant Hunt, Stamp Upper and Lion's Claw will stagger them
Stamp Upper can dodge some of their attacks by crouching under the blade
Lion's Claw will grant you Super Armor to prevent you from being interrupted by their attacks, using this skill 3 times in a row will stance break them, allowing you to perform a critical hit and heal before they can get up.
Super Armor does not prevent poise damage, it instead prevents all incoming hitstun (except status stuns).
In certain areas, they can fly off a cliff and die if they use the wing swoop attack
They take 30 less damage from critical attacks.
Crucible Knight (Sword) Boss Guide
Crucible Knight (Sword) Boss Video Guide.
Crucible Knight (Sword) Fight Strategy
The Best Tips for Crucible Knight:
Use Cuckoo Glintstones to hit their back when its shield is facing you.
Giant Hunt and Stamp (Upward Cut) can stagger it out of many of its moves.
For co-op, Ancient Lightning Spear (Bolt of Gransax skill) is useful - when fully charged, it makes Crucible Knight flinch.
Jumping attacks can be a good counter to their charge attack.
Melee Users
Crucible Knight's attacks are slow and easy to predict, but hit very hard when they land.
Take your time, don't panic, and don't go for more attacks than you have time for trading damage is not the way to win this fight.
Dodge multiple times until its combo is done, then counterattack.
Don't be afraid to dodge forward through attacks, as this can put you in better position.
Be particularly careful of its Seismic Wave attack, which hits a wide area but can easily be jumped and (with more difficulty) rolled.
Parrying: Because its attacks are quite easy to predict, Parrying is a great way to get in damage consistently.
Most of its Phase 1 attacks are parriable and you can often parry several in a row, but be prepared to roll if you see it preparing to do a Shield Bash or Seismic Wave.
Avoid Status: Not only does Crucible Knight have high resistance to all status ailments, its aggressive attack patterns make it hard to land frequent hits.
This makes status ailments a poor strategy.
It's much better to use a weapon that does a high amount of raw damage than one whose power comes from building up Poison or Hemorrhage.
Heal Decisively: Crucible Knight has a tendency to do an attack when you try to heal with your flask when it isn't in an attack or recovery animation.
This makes it very risky to heal even at a large distance between you and it.
Heal only during recovery animations you KNOW the Crucible Knight can't get out of, such as Flying Dive and Seismic Combo.
Magic and Ranged Users
Roll directly away from its attacks to keep your distance.
Seismic Wave is the most challenging, because it's hard to reliably dodge by rolling away; you can instead jump away to avoid this, or roll to either side.
Chip Away: Although the Crucible Knight's shield will block many magic spells, it'll still take chip damage.
You can whittle away its health very effectively by spamming spells if you have enough Cerulean Flasks.
In addition to the chip damage through the shield, you'll be able to get some full hits in when its guard is down during an attack or recovery.
Crucible Knight (Sword) Attacks & Counters
Attack
Description
Counter
Diagonal Slam
The knight raises it's sword vertically and high above and right to it's head then slams it diagonally down to it's left side of the ground.
The knight's sword point flicks upwards a bit to become vertical just before attacking.
When you see it raise it's weapon up, wait for the flick, or for it to be wholly vertical then dodge.
Lunging Stab
The knight draws it's sword back horizontally while it runs towards you then stabs its sword straight ahead.
This attack has a surprisingly long hitbox and is commonly used when you are trying to heal.
When you see the knight's sword draw back, dodge to either side as soon as you see the sword drawn back at it's maximum distance.
(It doesn't move in relation to the Crucible Knight at this point.
) In Phase 1 ONLY, you can get a single attack on the knight after it does this move.
In Phase 2, the Tail Spin attack makes countering this unsafe.
Running Slash
Runs towards you with its sword held horizontally against its left shoulder, then swings clockwise.
Often used to try to prevent you from healing.
Roll in any direction except to your left a little under a second after you see the sword move to it's shoulder.
Shield Bash
Hunches down behind its shield and takes a few steps towards you before lifting it up in the air
Dodge into or around its shield, then attack back during the long recovery period
Grinding Swing
Drags its sword along the ground to its left sending up sparks, then slashes it upwards
Dodge in any direction.
Or, a well-timed parry.
Or, get a few attacks in, and parry at the last second.
Seismic Wave
Raises its left knee with its sword out to one side, then stomps creating a shockwave along the ground
Jumping is the most reliable way to avoid this, but can take some practice if you're used to rolling.
Rolling left, right, or forwards also works, but rolling backwards has much tighter timing and is not recommended.
Seismic Combo
Holds its sword aloft while doing a Seismic Wave, then slams it down in front.
If the player is in range, it spins clockwise slashing twice with its sword.
It's safest to jump or dodge backwards and get out of range for the rest of the combo, but you can also dodge once to the side and then again backwards.
If you're at a safe range from the second swing, you can jump over the third and land a jump attack followed by another attack once you're on the ground to punish the long recovery time.
Only the sword swings are parriable
Ordovis's Vortex
Spins its greatsword behind its head and then slams it down, causing a small explosion.
Only Crucible Knight Ordovis and Tanith's Knight can do this move.
Run back during the long windup.
If you time it correctly, you can dodge around them to get in a hit or two.
Also, the attack is slow enough that you can get in some hits and still have enough time to parry.
Phase 2
Phase Transition
Raises its right knee and stomps, releasing a small blast of holy energy.
This is always the first attack it does in Phase 2, and always followed by a Flying Dive.
Walk backwards, or roll if you're wanting to be careful, and prepare for a Flying Dive.
Flying Dive
Grows a pair of golden wings and leaps into the sky, then dives towards you with sword outstretched
Roll towards it once its sword is level with the ground.
This attack can be jumped over
Tail Spin
Grows a small golden tail and swings it in a circle counterclockwise.
Usually uses this attack after any combo if you're in melee range in Phase 2 once but can also rarely do 2 of these in a row or begin a combo with this attack.
Roll to your right as soon as you see the tail.
The attack comes out very quickly so make sure you are focused so you have enough reaction time to dodge.
Do NOT try to punish any other attack in Phase 2, especially if you are using a melee weapon.
However, you can punish this attack by doing a light attack once after you dodge, easier to do this with fast weapons like daggers.
Great Tail Spin
Grows a large golden tail and swings it in a circle clockwise.
The tail then gets even larger and spins in another circle.
Only used below 40 health and also only ever used after Flying Dive.
If you don't immediately chase after the Crucible Knight after Flying Dive, the first tail swing will automatically miss you.
However, you will usually always be in range of the second tail swing.
If you are further than approximately 5 metres away, dodge to your right after seeing the second tail.
Otherwise dodge roll twice as soon as you see both tails respectively.
Fire Breath
Grows a large throat sac and walks forward while breathing fire in a conical area in front of it.
Run away when you see the bag on its throat inflate.
Fire Breath Retreat
It will grow a large throat sac, jump backwards, and breathes a short-ranged burst of fire.
Roll away when you see it jump back.
: Attack can be parried
Crucible Knight Notes & Other Trivia
Late-game Crucible Knight are affected by healing incantations.
Crucible Knight (Sword) Combo Chart
Crucible Knight (Spear) Boss Guide
Crucible Knight (Spear) Fight Strategy.
The Best Tips for Crucible Knight:
Use Rock Sling (3-4 hits will break its stance)
Melee Users
The fight against this boss is hard but very well balanced, it makes quick heavy attacks and moves around the field very quickly.
But your advantage is that it does not have a great pool of Health.
When you face a spear knight with melee, try to keep close and stay behind.
You can summon spirit ashes if you choose to.
Keep circling to avoid their line of sight, therefore avoiding their hit range making it easier for you to parry or roll through any attacks.
This will also put you in a better position to attack.
With the knights, it is recommended to parry their attacks rather than avoid due to their poise and stamina.
At mid range, make sure to back up and roll away from these hits.
If it performs a stab, block it with your shield if you brought one with you.
It is possible to interrupt some of its attacks.
If given a window, deal a critical hit then when they are down, follow up with a series of attacks.
Their hp should deplete quickly due to their smaller health pool.
Use a combination of baiting and waiting for these windows while parrying other attacks and dodging into another position until its hp its depleted.
If it comes in for a grab attack, avoid it to refrain from taking a great a mount of damage.
Magic and Ranged Users
The Knight can be attacked from a far distance before it comes into battle.
Ride your mount.
Keep distance, reload and drink mana potions while keeping distance.
This boss takes a lot of damage against Spells.
Use your heavy handed spells and continue to circle and reposition behind it.
If you want to keep a further distance, there is a roof nearby where you can position yourself where it can't reach you.
You can continue to deal any kind of ranged attacks from here.
If not, be weary of its quick lunges and dashes that are quick actions.
Be ready to dash back and continue to attack until its health bar is depleted.
Crucible Knight (Spear) Attacks & Counters
Attack
Description
Counter
Swing
Swings its spear in various directions
Dodge diagonally forward to avoid follow-ups, then land a hit if you're in a safe location; or guard and attack back quickly before it combos
Thrust
Thrusts its spear forward
Dodge to the side
Lunging Thrust
Runs towards you then thrusts its spear straight ahead
Dodge to the side and land a quick hit
Spear Slam
Raises its spear above its head then slams its down onto the ground, kicking up dirt
Dodge to the side and land a quick hit
Double Strike
Swings its spear clockwise into the ground, kicking up dirt, and then counterclockwise back out again
Dodge towards its right side and land a hit while it's still locked into the attack
Seismic Wave
Raises its left knee with its sword out to one side, then stomps creating a shockwave along the ground
Jumping is the most reliable way to avoid this, but can take some practice if you're used to rolling.
Rolling left, right, or forwards also works, but rolling backwards has much tighter timing and is not recommended.
Siluria's Woe
Holds up its spear and starts spinning it, creating a cone of holy energy, then thrusts it forward shooting an energy spiral.
This is usually limited to Phase 2, but can be used in response to item use in Phase 1
Roll as soon as it begins to step forward.
Phase 2
Phase Transition
Raises its right knee and stomps, releasing a small blast of holy energy.
This is always the first attack it does in Phase 2, and always followed by a Flying Dash
Walk backwards, or roll if you're nervous, and prepare for a Flying Dash
Flying Dash
Grows a pair of golden wings and leaps into the sky with holy energy whirling around its spear, then quickly dives forward and creates an explosion where it lands
Roll forward as you see its wings become vertical
Horn Impale
Summons a long horn of holy light on its hand and swings it forward, impaling you if it hits.
Since this is a grab attack, it cannot be blocked.
Dodge back and to your left.
This attack can come out very quickly and deals a lot of damage.
Horn Shoulder Charge
Summons horns on its shoulder and shoves them towards you, dashing to cover distance if necessary.
Dodge forward and to your right when you see it start to move
: Attack can be parried
Crucible Knight (Spear) Combo Chart
Crucible Knight Stormhill EvergaolEvergaol.
Drops
2,100
Aspects of the Crucible: Tail
HP
2,782 |